
How to build a mirror box that fits your therapy or display needs
By Becca Published 7 min read
As an Amazon Associate I earn from qualifying purchases. That costs you nothing and does not decide what gets recommended.
On this page (8 sections)
- Key takeaways
- What you need to build a mirror box
- Choosing and adapting the box size for your mirror use
- Step-by-step assembly instructions
- Tips for safe handling and durability
- How to adapt your mirror box size for different uses
- Common mistakes to avoid when building a mirror box
- Questions people still ask
In short: To make a mirror box, build a wooden frame sized to your needs, fit a mirror pane on one side, and cover the rest with sturdy panels. Use 1/4-inch mirror glass for safety and secure all edges with smooth trim to avoid injury.
Part of our guide on packing paper vs bubble wrap for dishes
Build a precise mirror box tailored for therapy or display with detailed materials and stepwise instructions ensuring safety and durability.
| Mirror thickness | 1/4 inch |
|---|---|
| Wood panel thickness | 1/2 to 3/4 inch |
| Typical box depth | 12-18 inches |
| Assembly time | 2-4 hours |
| Weight capacity | depends on wood type |
Key takeaways
- Use 1/4-inch thick mirror glass for durability and safety
- Build the box slightly larger than the mirror for secure mounting
- Seal edges with trim to prevent cuts and damage
- Choose wood like pine or MDF for ease of cutting and stability
- Adjust box size based on intended use: therapy or decorative
What you need to build a mirror box
Start by gathering essential materials: wood panels for the frame and backing, a mirror pane, wood glue, screws, and finishing trim. Choose a mirror size based on your therapy or decorative needs.
You'll also need tools: a saw capable of cutting your wood panels, a drill with screwdriver bits, clamps to hold pieces while drying, measuring tape, sandpaper for smoothing edges, and safety equipment like gloves and goggles.
- Wood panels: 1/2 to 3/4 inch thick, such as pine or MDF
- Mirror: 1/4 inch thickness recommended for safety
- Wood glue and screws: for strong joints
- Trim strips: smooth protective edging
- Basic tools: saw, drill, measuring tape, clamps, sandpaper
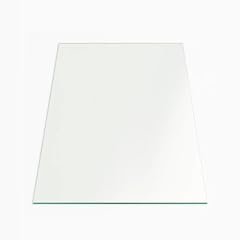
YANA Glass and Mirror Rectangle Glass Table Top 20"x24" 1/4" Thick Tempered
Provides the required 1/4 inch (0.25 inch) thick tempered glass for safe and durable mirror box construction.
Choosing and adapting the box size for your mirror use
Choose the box dimensions to suit the mirror's function. For therapy, typical box dimensions are about 12-18 inches deep, providing enough space to position hands comfortably behind the mirror.
Decorative mirror boxes can be shallower if they only serve as frames or displays. Add 1-2 inches beyond the mirror size in width and height for framing and mounting. For the detail, see our notes on how to label moving boxes.
Ensure the depth accommodates the mirror thickness plus any mounting hardware. Oversizing the box helps prevent accidental contact with the mirror edges and provides space for trim.
When measuring for your mirror box, consider the specific movements or interactions intended. For example, in mirror therapy for stroke rehabilitation, the box often needs to accommodate not just the hand but also the forearm, which can require depths of up to 20 inches. This larger depth ensures comfort and natural positioning during exercises, reducing strain and improving therapy outcomes.
If your mirror box is for display purposes, think about lighting and viewing angles. A deeper box can allow space for LED strip lights or spotlights around the mirror edge to enhance visual appeal. For instance, a depth of 4-6 inches can house small lighting fixtures without protruding beyond typical shelf or wall space. This addition can transform a simple mirror box into a focal décor piece. If that sounds like your situation, read up on packing mirrors without breakage next.
- Therapy boxes: 12-18 inches deep, larger for arm movement
- Display boxes: 2-4 inches deep, just enough for mirror thickness
- Add 1-2 inches to mirror dimensions for frame allowance
Step-by-step assembly instructions
Carefully cut wood panels for the box sides based on your measured dimensions. Sand edges smoothly to prevent splinters.
Assemble the frame by gluing and screwing the side panels to a back panel, leaving one side open where the mirror will go.
Attach the mirror safely on the open side using mirror adhesive or clips, ensuring it is flush and stable. For the detail, see our notes on how to pack picture frames with glass.
Finish by adding trim around all edges to protect the mirror and provide a neat appearance.
Before gluing and screwing the panels together, dry-fit all pieces to confirm accurate alignment. This step helps avoid gaps or misalignments that could compromise the mirror's stability or the box's appearance. For example, place the four side panels and back panel on a flat surface and clamp them temporarily to ensure corners are square and edges flush.
When attaching the mirror pane, clean the glass thoroughly with a glass cleaner and lint-free cloth to remove dust and fingerprints. This prevents imperfections from being sealed behind the glass. Apply mirror adhesive in small dots or thin beads at intervals to secure the mirror evenly. After fitting, press gently and hold for a few minutes or clamp lightly to ensure full adhesion without cracking the glass.
- Measure and cut four side panels and a back panel according to the box size.
- Sand all cut edges to remove splinters and roughness.
- Apply wood glue to edges; clamp and screw the pieces together to form a sturdy box.
- Fit the mirror pane into the open front, secure with adhesive or clips.
- Attach smooth trim around the mirror edge and box edges.
Tips for safe handling and durability
Use tempered or safety-backed mirror glass if possible to reduce injury risk on breakage.
Seal all edges and joints tightly to keep dust and moisture out, which can degrade the mirror and wood.
Regularly check screws and trim for loosening during use, especially if used for therapy requiring movement.
If you plan to move your mirror box frequently or use it in a therapy setting with repetitive motions, consider reinforcing corners with metal L-brackets inside the frame. This prevents loosening joints and maintains structural integrity over time. For example, small 1.5-inch brackets can be discreetly installed without affecting the box's external look.
To maintain durability, periodically treat the wood surfaces with a clear polyurethane finish or wax. This seals the wood against moisture and dust, especially in humid environments. For a mirror box used in therapy, such treatments can extend the life of the box by several years. Inspect the finish annually for signs of wear or cracking and reapply as needed.
- Tempered mirror glass: safer if broken
- Seal edges with caulk or trim for durability
- Inspect and tighten fixtures periodically
How to adapt your mirror box size for different uses
For therapy, allow at least 12 inches of depth for hand placement behind the mirror. Widen box accordingly to accommodate arm movement.
For display, a shallow box just covering the mirror edges is enough. Consider glass thickness and decorative framing requirements.
Adjust height and width based on mirror shape and user needs, ensuring comfortable interaction with the box.
| Use | Depth (inches) | Width Over Mirror (inches) | Height Over Mirror (inches) |
|---|---|---|---|
| Therapy | 12-18 | 1-2 | 1-2 |
| Decorative Display | 2-4 | 0.5-1 | 0.5-1 |
Common mistakes to avoid when building a mirror box
One frequent mistake is neglecting to sand edges thoroughly after cutting the wood panels. Rough or sharp edges can cause splinters or damage to the mirror adhesive, leading to poor bonding or injury during use.
Another common error is underestimating the importance of securing the mirror edges firmly. Without trim or clips, the mirror may shift or loosen over time, especially during therapy involving hand movements behind the glass. This instability can cause cracking or safety hazards.
Additionally, not accounting for wood expansion due to humidity can cause warping or pressure on the mirror pane. Using kiln-dried wood and sealing all surfaces helps minimize this effect. Ensuring adequate ventilation around the mirror box can also prevent moisture buildup that damages both wood and mirror surfaces.
- Inaccurate measurements -> Always double-check before cutting
- Using thin or flexible wood -> Choose sturdy panels to prevent warping
- Failing to secure mirror edges -> Use trim or clips to avoid injury
- Neglecting protective gear -> Wear gloves and goggles when handling glass
- Oversized boxes without support -> Add internal braces for large mirrors
Questions people still ask
Can I use acrylic instead of glass for the mirror?
Acrylic mirrors are lighter and less prone to shattering, making them safer and easier to handle. However, they scratch easily and may distort reflection quality compared to glass.
What wood is best for making a mirror box?
Pine and MDF are common choices for mirror boxes due to affordability and ease of cutting. Hardwood is more durable but harder to work with.
How do I ensure the mirror stays securely in the box?
Use mirror clips or a strong mirror adhesive designed for glass and wood. Adding trim around edges also helps hold the mirror firmly.
Is it necessary to use tempered glass for therapy mirror boxes?
Tempered glass is safer because it breaks into small, less harmful pieces. It is recommended for therapy mirrors due to frequent use and handling.
Can I paint or finish the mirror box wood?
Yes, painting or sealing the wood protects it from moisture and wear, improving durability and aesthetics. Use non-toxic finishes if the box will be handled frequently.